How to issue a credit as a refund.
The athleteReg credit feature allows event directors to make the choice between issuing a refund to participants or issuing a credit for a current or future event. Credits are initially counted toward any active or future events in an event director’s account, but can be edited by the event director to only apply to specific events.
When issuing a credit, event directors have the choice to either keep the participant in the category, or to remove them from the category. When a credit is created, the participant in question is emailed a code with details regarding its use. They will need to save this email so they have all the information to use their credit. They can also click a link in the email that shows the balance of their credit. As the Event Director, you can see all your issued credits in your Event Director Tasks menu, under the Coupons / Credits link.
A credit will be pre-filled with the amount of the original entry fee, but this can be changed to any dollar amount.
A credit can have an expiration date, or not; this can always be edited at a later date through the Coupons / Creditsinterface described above.
Issuing a credit will NOT affect your event balance, you will still be paid out the full amount listed on your event dashboard.
Issuing a Credit
To issue a credit use the following steps:
1. Login to the event that you wish to issue a credit for, and navigate to the participant in question either via Registration Summary or Edit / Search Registrations.
2. Once the participant’s entry is showing, click on the ellipses next to the edit button to open up a sub-menu where you will select Refund / Credit (this is the same interface you would use to refund a participant).

3. From here, a new menu will open up. Under Refund Type, choose Credit. Choose to keep them in the category, or remove them from it.

4. The credit amount will be pre-filled with the amount that they paid for the entry fee. You can choose to alter this amount if you wish.
5. Choose whether the credit will have an expiration date, and if so, what that date will be (you can alter this date later if circumstances change).
6. Finally, a pre-filled message will be sent to the participant along with a link to track their credit balance. You can alter this message if you wish.
7. Click the Credit button and then the credit will be created and the message will be sent to the participant.
Editing a Credit
To edit an existing credit, use the following steps:
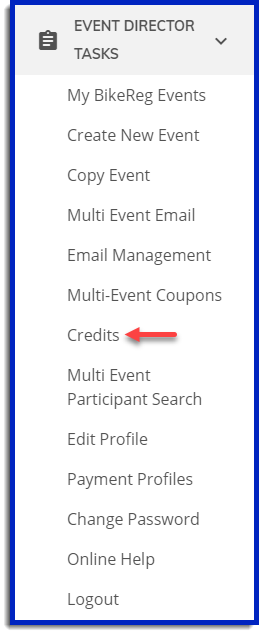
1. Navigate to your Event Director Tasks menu and choose Coupons / Credits.
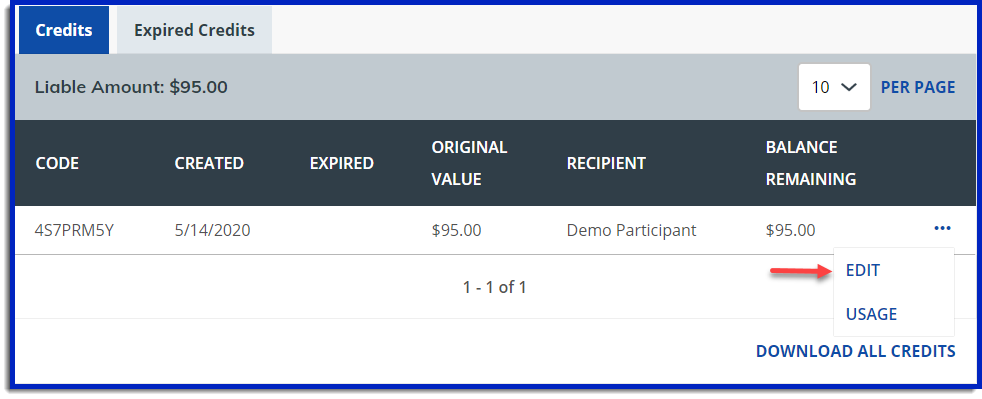
2. In this new menu, click on the top header titled CREDITS to change to the credit menu and then you can choose to view the credit’s usage, delete the credit, or edit the credit. To edit the credit, choose Edit.
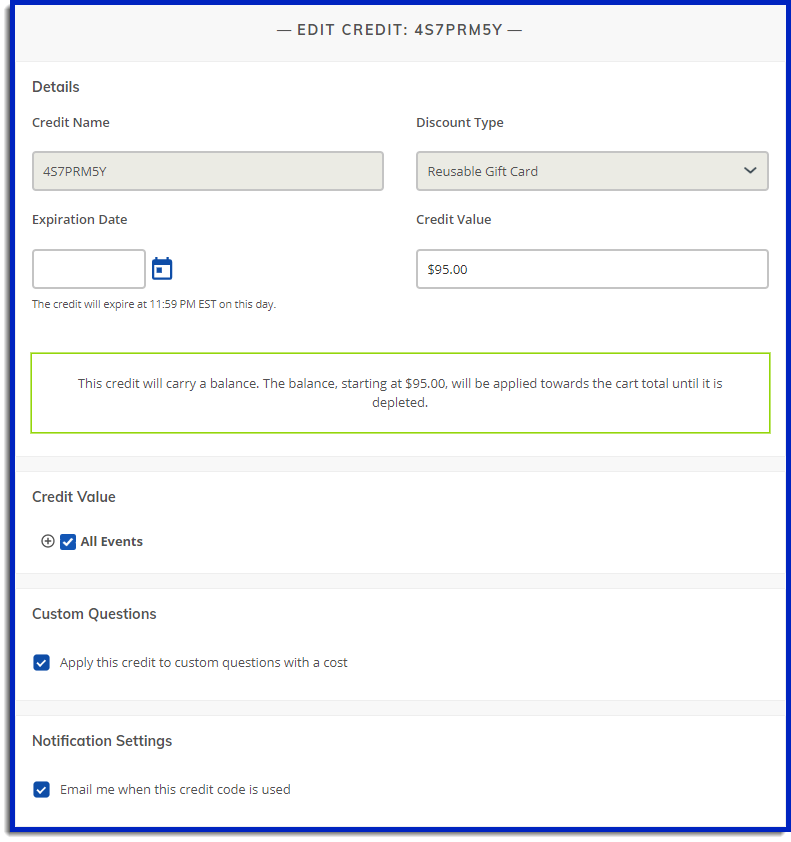
3. Once in the Edit menu you can change the expiration date, the events that the credit applies to and the amount for which the credit is for.